


Copyright © 2026 NOVABEYOND LIMITED (company number 2833487). All rights reserved.
Address: UNIT 616 6/F KAM TEEM INDUSTRIAL BUILDING 135 CONNAUGHT ROAD WEST SAI WAN HONGKONG.
In today's highly competitive digital marketing landscape, advertisers are demanding more than just compliant traffic and high conversion efficiency—they’re also prioritizing a seamless user experience. As a result, integrated platforms that combine global media reach with AI-powered optimization are becoming the go-to choice for leading brands.
In a previous article, we explored the rise of native advertising and introduced MediaGo—a performance-driven intelligent ad platform for the Open Internet, powered by deep learning technology to deliver tangible value for advertisers. Whether for e-commerce, subscription services, or app user acquisition, MediaGo delivers full-funnel advertising solutions—from reach and engagement to conversion and retention.
Today, we will walk you through the basics of advertising on MediaGo DSP. This guide will cover campaign setup, targeting, budgeting, and optimization strategies to help advertisers unlock growth opportunities.
Ad Campaign Setup Process
Creating and launching an ad campaign on the MediaGo platform involves the following core steps.
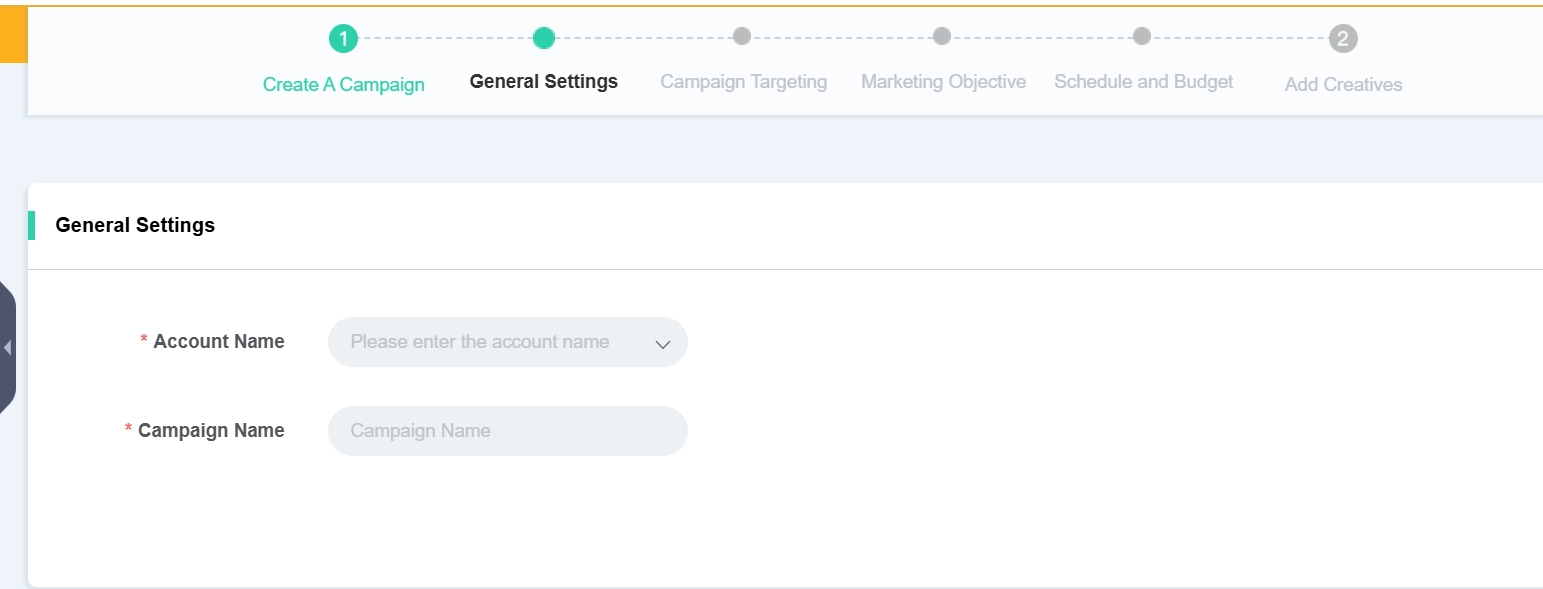
1. Basic Setup
First, select the advertising account where you want to create a new campaign and give your campaign a name.
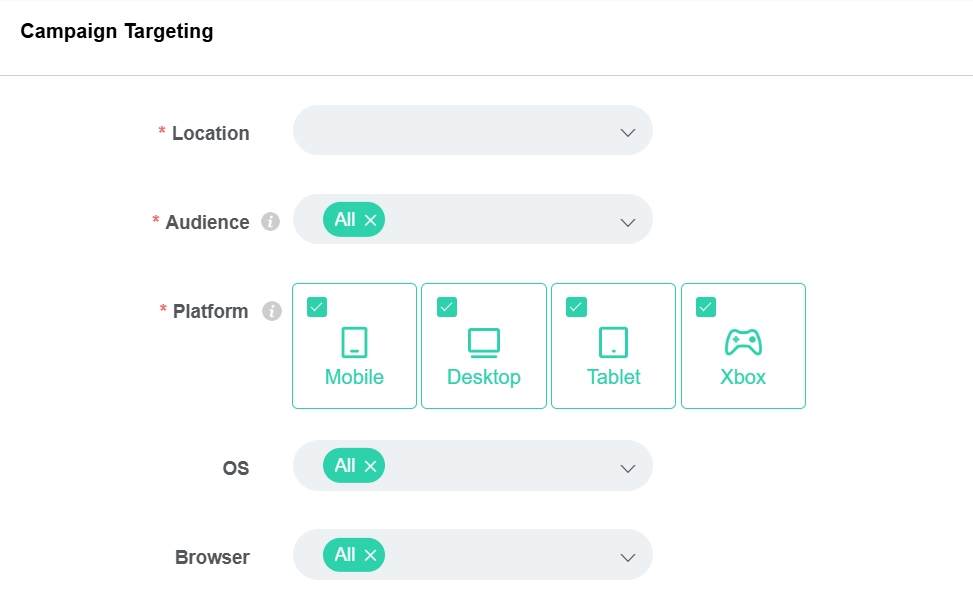
2. Audience Targeting
MediaGo supports targeting by country or region, with the option to narrow down to the state and ZIP code level. It is important to ensure that the language of your landing page matches the market selected in your targeting settings.
The platform also supports multi-dimensional targeting combinations by operating system, browser, and platform.
3. Define Campaign Objective and Ad Settings
After creating your campaign, you need to define its objective. This will guide all subsequent actions, such as bidding and optimization.
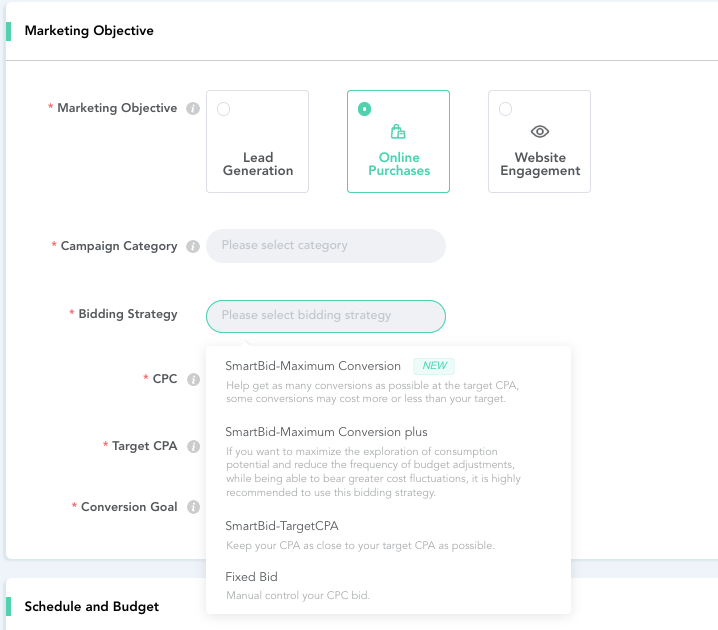
● Campaign Objective: Choose from Lead Generation, Online Purchase, or Website Engagement.
● Ad Types: Select the category that your ad offer belongs to.
● Bidding Strategy:Choose between three “Smart Bidding” modes or “Fixed Bidding.”
Smart Bidding modes:
① Maximum Conversion: Aims to get the most conversions for the set budget.
② Maximum Conversion – Plus: Builds on Maximum Conversion, allowing for higher budget utilization and greater tolerance for cost fluctuation.
③ Target CPA: Aims to maintain a stable cost per conversion.
For automatic performance optimization, we recommend using a Smart Bidding mode. If you have a strict CPC requirement, select Fixed Bidding. Please note that Smart Bidding relies heavily on conversion data, so ensure your conversion tracking is set up correctly and the data is accurate before you begin.
●Bid Settings: (Required for Target CPA and Fixed Bidding) Enter your CPC and your target cost per action (Target CPA).
4. Schedule and Budget
After setting up your bidding strategy, you can schedule your campaign with specific start and end dates. Ads can run continuously or during selected time slots.
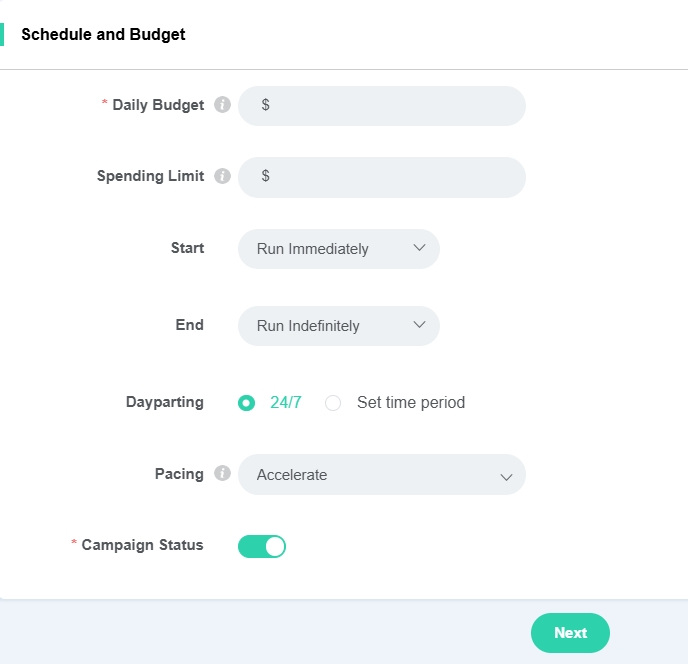
For budget settings, set a daily budget of 5–10 times your target CPA or a minimum of $50/day. You can also set a total budget for the campaign. You can also select the ad delivery speed to control how quickly your budget is spent. We recommend using the ‘Accelerate’ option.
① Accelerate – Optimizes for conversion performance, which may result in faster budget spending.
② Standard – Distributes your budget more evenly over the scheduled campaign duration.
5. Creative Upload
Once you have completed all settings, you can upload your creatives and preview how they will appear in ad placements.
● Creative Types
① Native Ads: You can upload images of any custom size. MediaGo will automatically crop them to fit various ad placements.
② Display Banner Ads: Images must be in one of the following standard sizes: 300x250, 728x90, 300x600, 320x50, 970x250, 300x50, 320x100, 160x600, or 336x280. These images will be placed in compatible ad slots without being automatically cropped.
● Upload Settings: You can upload creatives individually or in bulk. The following information is required:
① Landing Page URL: Must be a valid URL starting with “http://” or “https://”.
② Tracking: You can use the recommended default tracking code or a custom tracking code.
③ Brand Name: Maximum of 30 characters.
④ Title: Maximum of 80 characters.
Campaign Recommendations
● We recommend including 5–8 creatives per campaign. The system will automatically allocate more of the budget to the best-performing ones.
● For new products or campaigns, we recommend a testing period of at least 7 days. During the first week, avoid making frequent adjustments other than increasing the budget. It’s best to adjust settings every 2–3 days to allow the campaign to stabilize and complete its learning phase.
● We recommend a daily budget of 5–10 times your target CPA, typically between $100–$300/day. It is generally not recommended to cap the total budget.
● For e-commerce campaigns, we recommend SmartBid mode (which requires Pixel integration). For native ad creatives, use a 16:9 aspect ratio with centered visuals and avoid large amounts of text. For display ads, be sure to include the 300x250 size.
As a core agency partner of MediaGo, Novabeyond provides professional, end-to-end advertising services — from account setup and campaign management to data optimization. Our experienced team helps brands achieve steady growth in a complex and ever-changing market.
If you would like to learn more about campaign case studies or practical insights, please feel free to leave us a message or contact us directly.
more posts
BIGO Ads vs Kwai Ads: How Geography and Category Shape Performance in Short-Video Ecosystems
June. 16 2026
LEARN MORE

Why TikTok Ads Live or Die by Creative and Meta Ads by Structure
June. 09 2026
LEARN MORE
Taboola and Native Traffic: Why Content-Contextual Advertising Is Your Next Performance Frontier
May. 27 2026
LEARN MORE
The June Marketing Playbook for Global E-commerce Brands
May. 22 2026
LEARN MORE